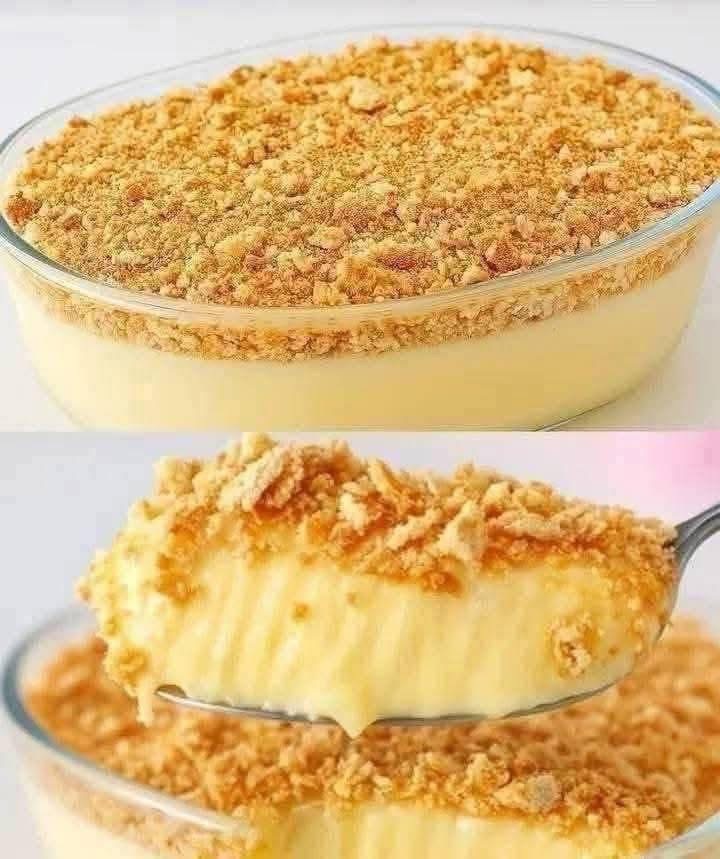
If you are looking for a dessert that balances a rich, velvety texture with a satisfying crunch, this no-bake creamy biscuit pudding is the ultimate crowd-pleaser. Requiring zero oven time, this elegant dessert features a silky, custard-like cream base topped with a generous layer of finely crushed golden biscuits, just like the beautiful preparation shown in image.png. It is perfect for hot summer days, last-minute gatherings, or whenever you want a high-reward sweet treat with minimal effort.
In this comprehensive guide, we will walk you through the essential ingredients, step-by-step instructions, and pro-tips to ensure your pudding sets flawlessly every single time.
The Ingredients You Will Need
To achieve the ultra-smooth consistency and perfect flavor balance seen in image.png, you only need a handful of simple pantry staples.
The Biscuit Layer: 200g of plain, sweet biscuits (such as Marie biscuits, Graham crackers, or Petit Beurre).
The Milk Base: 1 liter (4 cups) of whole milk for maximum creaminess.
The Thickener: 4 tablespoons of cornstarch or custard powder.
The Sweetener: 1/2 cup of granulated sugar (adjust to your personal taste preference).
The Flavor Enhancer: 1 teaspoon of pure vanilla extract.
The Cream Enrichment: 1 cup of heavy cream or thickened whipping cream to add that luxurious mouthfeel.
Optional Butter: 2 tablespoons of melted unsalted butter (to help bind the top biscuit layer if you prefer a slightly denser crust).
Step-by-Step Preparation Guide
Step 1: Prep the Biscuit Topping
Take your sweet biscuits and place them into a food processor. Pulse them until they form a uniform, sandy texture with a few small, crunchy chunks left for contrast. If you do not have a food processor, simply place the biscuits in a zip-top bag and crush them thoroughly with a rolling pin. Divide the crumbs; set aside the majority for the thick top layer as displayed in image.png.
Step 2: Mix the Custard Base
In a large, heavy-bottomed saucepan, pour in the cold whole milk. Whisk in the cornstarch (or custard powder) and granulated sugar while the milk is still cold. This prevents any lumps from forming. Mix until the powder is fully dissolved.
Step 3: Cook Until Thick and Velvety
Place the saucepan over medium heat. Stir continuously with a whisk or a silicone spatula, making sure to scrape the bottom of the pan so the mixture does not burn. After 5 to 7 minutes, the liquid will begin to simmer and thicken into a smooth, glossy pudding. Once it coats the back of a spoon, remove it from the heat and immediately stir in the vanilla extract.
Step 4: Fold in the Cream
Let the hot pudding cool down slightly for about 5 minutes. In a separate bowl, whip your heavy cream until soft peaks form. Gently fold the whipped cream into the warm custard mixture. This step is the secret to achieving the airy, melt-in-your-mouth texture highlighted in the spoonful closeup within image.png.
Step 5: Assemble and Chill
Pour the smooth cream mixture directly into a large glass dish or individual serving ramekins. Smooth the top surface with a spatula. Carefully spread the reserved crushed biscuits evenly over the entire surface, creating a beautiful, golden crust.
Cover the dish with plastic wrap and refrigerate for at least 4 hours, or ideally overnight, to let the pudding set firmly.
Pro-Tips for the Perfect No-Bake Dessert
Preventing Skin Formation: If you want to layer biscuits inside the pudding as well, press plastic wrap directly onto the surface of the hot custard while it cools to prevent a tough skin from forming.
Experiment with Flavors: You can easily customize this dessert by infusing the milk with orange zest, adding a splash of espresso to the cream, or using chocolate-flavored biscuits for a rich twist.
Perfect Slicing: To get clean spoonfuls or slices like the one shown in image.png, ensure the pudding is thoroughly chilled. Serving it too early will result in a runny consistency.